Quickstart
The entire reason behind the existence of GridCast was to create patterns of mechanics easily and really quickly.
Follow these steps to make and test your first pattern
This is a detailed step by step to have you create your first pattern and test it in the game world.
WARNING
This demo was using the ThirdPersonTemplate so some class names refer to them.
1: Creating Required Assets
TIP
This plugin depends on StructUtils and GameplayTagsEditor for 5.4. This plugin depends on GameplayTagsEditor for 5.5+
Creating a datatable for GameplayTags
GridCast uses GameplayTags as identifiers for different chains, you can structure your tags however you want. These can be elements like fire, ice and thunder if you want but I like to name them in a generic manner so the same tags can be used for multiple patterns and the context of where they are being used can give more meaning to those generic names.
Follow these steps to add a new datatable to your project with these GameplayTags:
Right-click in the content browser -> Miscellaneous -> DataTable. Pick GameplayTagTableRow in the window that opens up.
Open it, in the RowName you can type the name of the chain for example “IceChain” and then the value for it should be “Chain.Ice”.
Fill it up with chain names as per your needs and then go to Edit->Project Settings.
Under project on the left, find “GameplayTags.” Clicking it, there should be an option for array of “GameplayTagTableList”.
Click on the + icon and select your datatable here.
Using pre-made datable for GameplayTags
Only follow this if you don't want to make a table for your own tags and havne't followed the steps above, otherwise skip this.
For users who don’t want to create their own datatable of tags, you can use the one that comes as part of the plugin itself. These are what I personally used and they are named in a very generic manner.
On the bar on top of the search bar in the content browser, there’s a settings button with a gear option. Click it and check “Show Engine Content, Show Plugin Content.”
Go to Edit->Project Settings. Under project on the left, find “GameplayTags.” Clicking it, there should be an option for array of “GameplayTagTableList”.
Click on the + icon and select “DT_GridCastChainTags” datatable here.
Creating your GridCastPattern Asset
Right click in the Content Browser, look for GridCast.
It has only one option right now, GridCastPattern. Select it.
Name it whatever you like and open it up.
WARNING
If at any point there's issues with the grid looking or drawing weird, consider clicking the "Refresh Grid" button. To prevent having to do all the math on tick for drawing the Grid and the pattern, it's using caching and this will refresh that.
2: Adding your chains
In the details panel is a single variable, this is the size of your grid, it can only be an odd number, right now, it’s capped between 3 and 21. Consider changing it before drawing your pattern.
The top bar of buttons has a refresh button, hit it after you decide on a grid size, the default 7 tends to work quite well.
At the top left of the editor, there’s a button for adding new chains, ”+ Add Chain.” Clicking it brings up the dialog to select details about it. You need to select a Chain Tag, a Chain Shape Type and a Chain Color.
For this one, select the Circle type, a gameplay tag to identify this chain and a color of your choice. Chain color is used for debug and in the UI to identify chains.
Hit add, this will add the first chain to this new pattern.
Now repeat these intial steps but pick "Line" as the shape type. For this demo, we want to add one circle chain, and one line chain.
After adding both, at the top, you should be able to select between the two in the "Current Select Chain" dropdown. The first one is selected by default.
WARNING
If you reduce the size of the grid after drawing links in it, any links that don’t fit the new bounds would be removed. For example, if you shift from Grid Size of 9 to 7 and have a link that’s at the bottom right, left or top right of the grid, it will be removed since it won’t fit the new bounds of the grid!
3: Drawing your Pattern
The first chain should be automatically selected, it should be the one with Circle as it's shape.
After selecting a current chain, the input for drawing a shape depends on the shape type you pick. For circle type, simply click any of the cells on the grid and a circle should appear there. Clicking again would remove the circle. This is how you draw for circle shaped patterns.
After drawing the circles you want, change the current selected chain to the second one, the one with lines shape. Clicking a cell will first select the starting point of the line, clicking another cell will form a line pointing in it’s direction. If you’ve already clicked to select a starting cell and then you click the starting cell again, it will cancel the line. If you want to remove a particular line, just click it’s start cell and then the end cell. Basically draw it again on top of itself and it will be removed.
Draw the circles and lines the way you want. The only thing that’s really important to remember is the the sequence you draw the pattern in. Since it works based on array, the order you draw the points on the grid is the order they will be processed in. Refer to Processing Types for more details.
There’s also a button to draw points randomly, it’s not a complex method, feel free to play around with it.
4: Executing the Pattern
WARNING
This demo is using the ThirdPersonTemplate, if you're using your own project, this demo assumes you know where to find the playable character class to follow along.
Open BP_ThirdPersonCharacter and add a GameplayTask component to it. This part of Unreal's GameplayTask feature and is required for GridCast's GameplayTask to work.
In the Event-graph, right click-> “Execute GridCast.” It’s a gameplay task implemented specifically to handle the delay and everything else about the Pattern you have just drawn in a single node itself.
Every parameter has as tooltip that explains what it does. For the demo, it's configured as shown below: 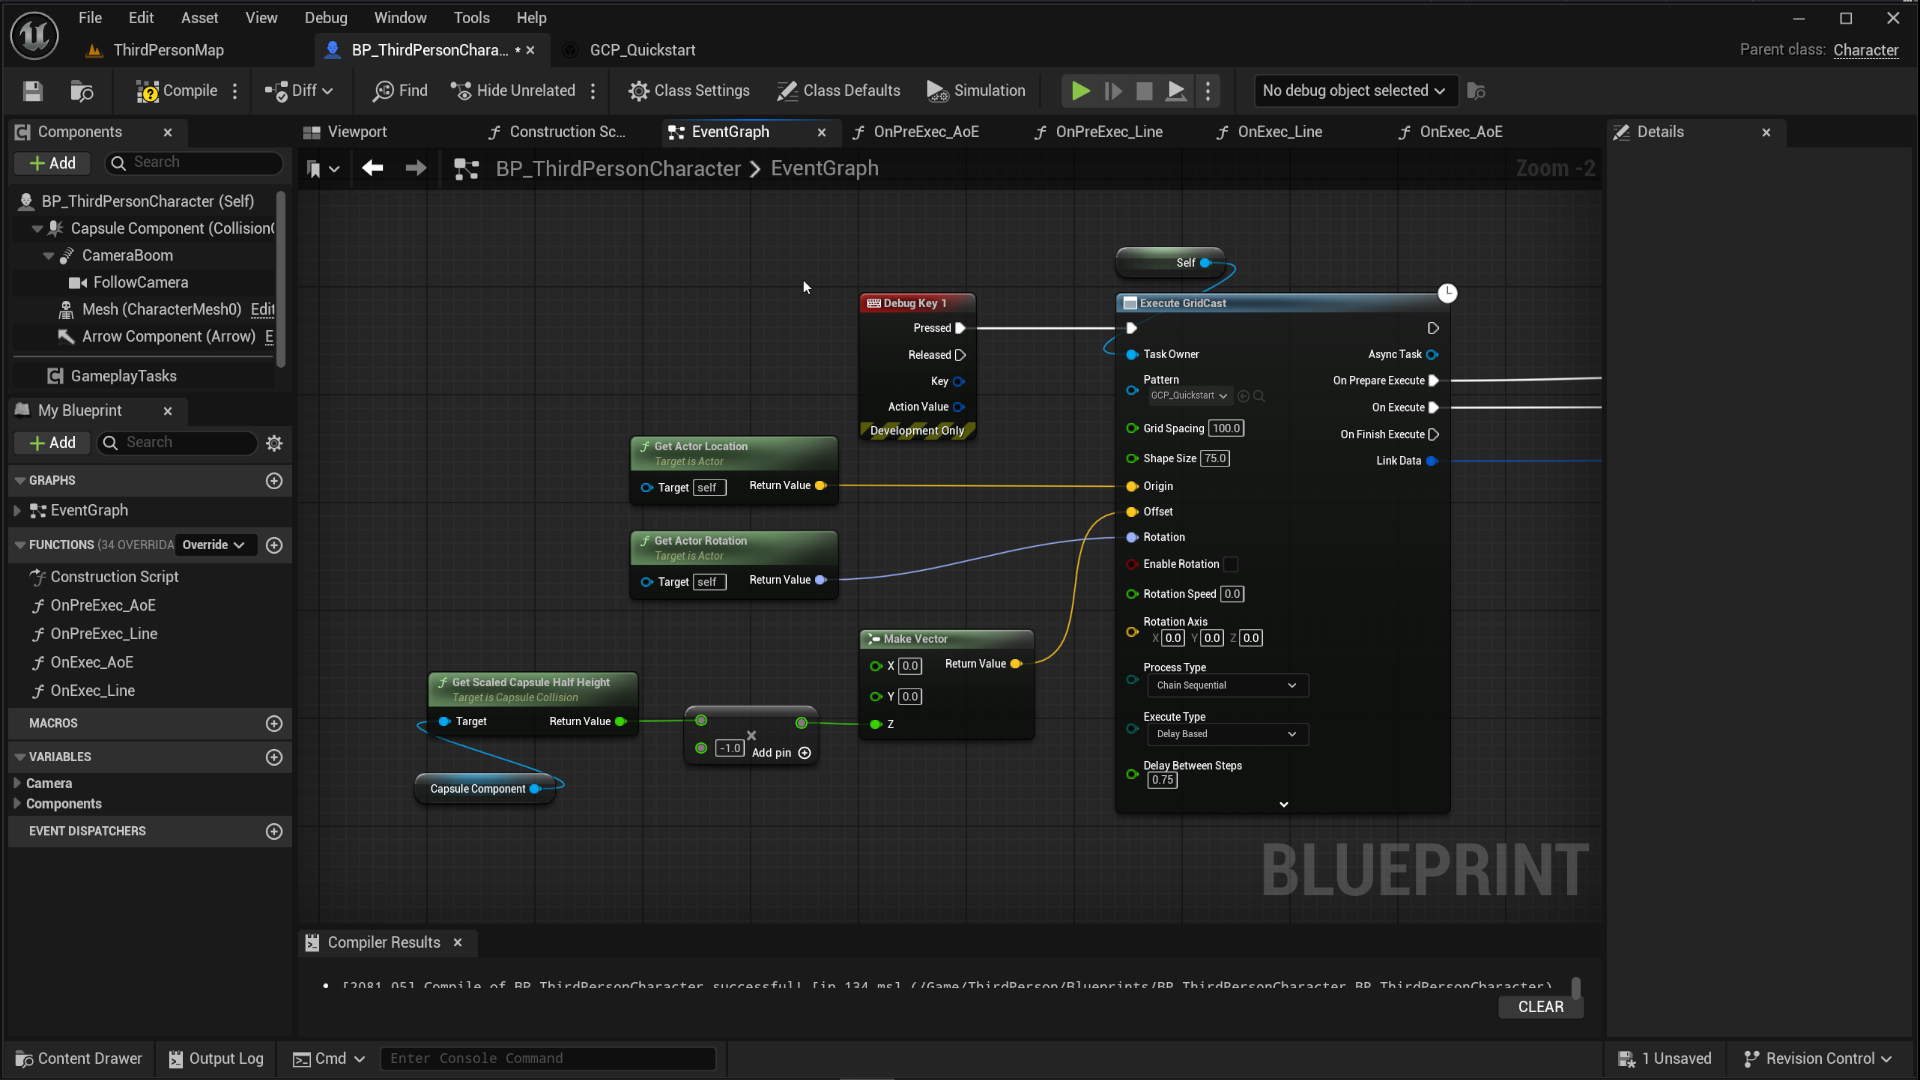
It’s an Async Gameplay Task, there’s four execution pins on the other side of the node. The top pin just continues execution once the task starts.
PreExecute is what it sounds like, it’ll fire at the start of the delay. It can be used to spawn telegraphs for the AoE effects, etc.
Execute fires at the end of the delay, this is where you can do your gameplay logic like doing hit detection, dealing damage, spawning addtional things, etc.
To make processing of data easier for users, there’s a delegate based workflow that will neatly organize each of those steps and let you isolate each of those things separately based on the type of the shape. Explained in next step.
5: Delegates and Testing
In the Event-graph, right click-> “Process Grid Cast Output Chains.” It’s a node that was added specifically to solve the problem of having to manually loop through your pattern steps. Drag a pin from the red delegate pins and then search for “Create Event.” A green node with a dropdown will come up.
In the drop down, click the option for “Create Matching Function.” Rename the function appropriately.
There will be a total of 4 functions by the end. For demo, I've named them as PreExec_AoE, PreExec_Line, OnExec_AoE and OnExec_Line appropriately. Their graphs should look as below:
PreExec_AoE: 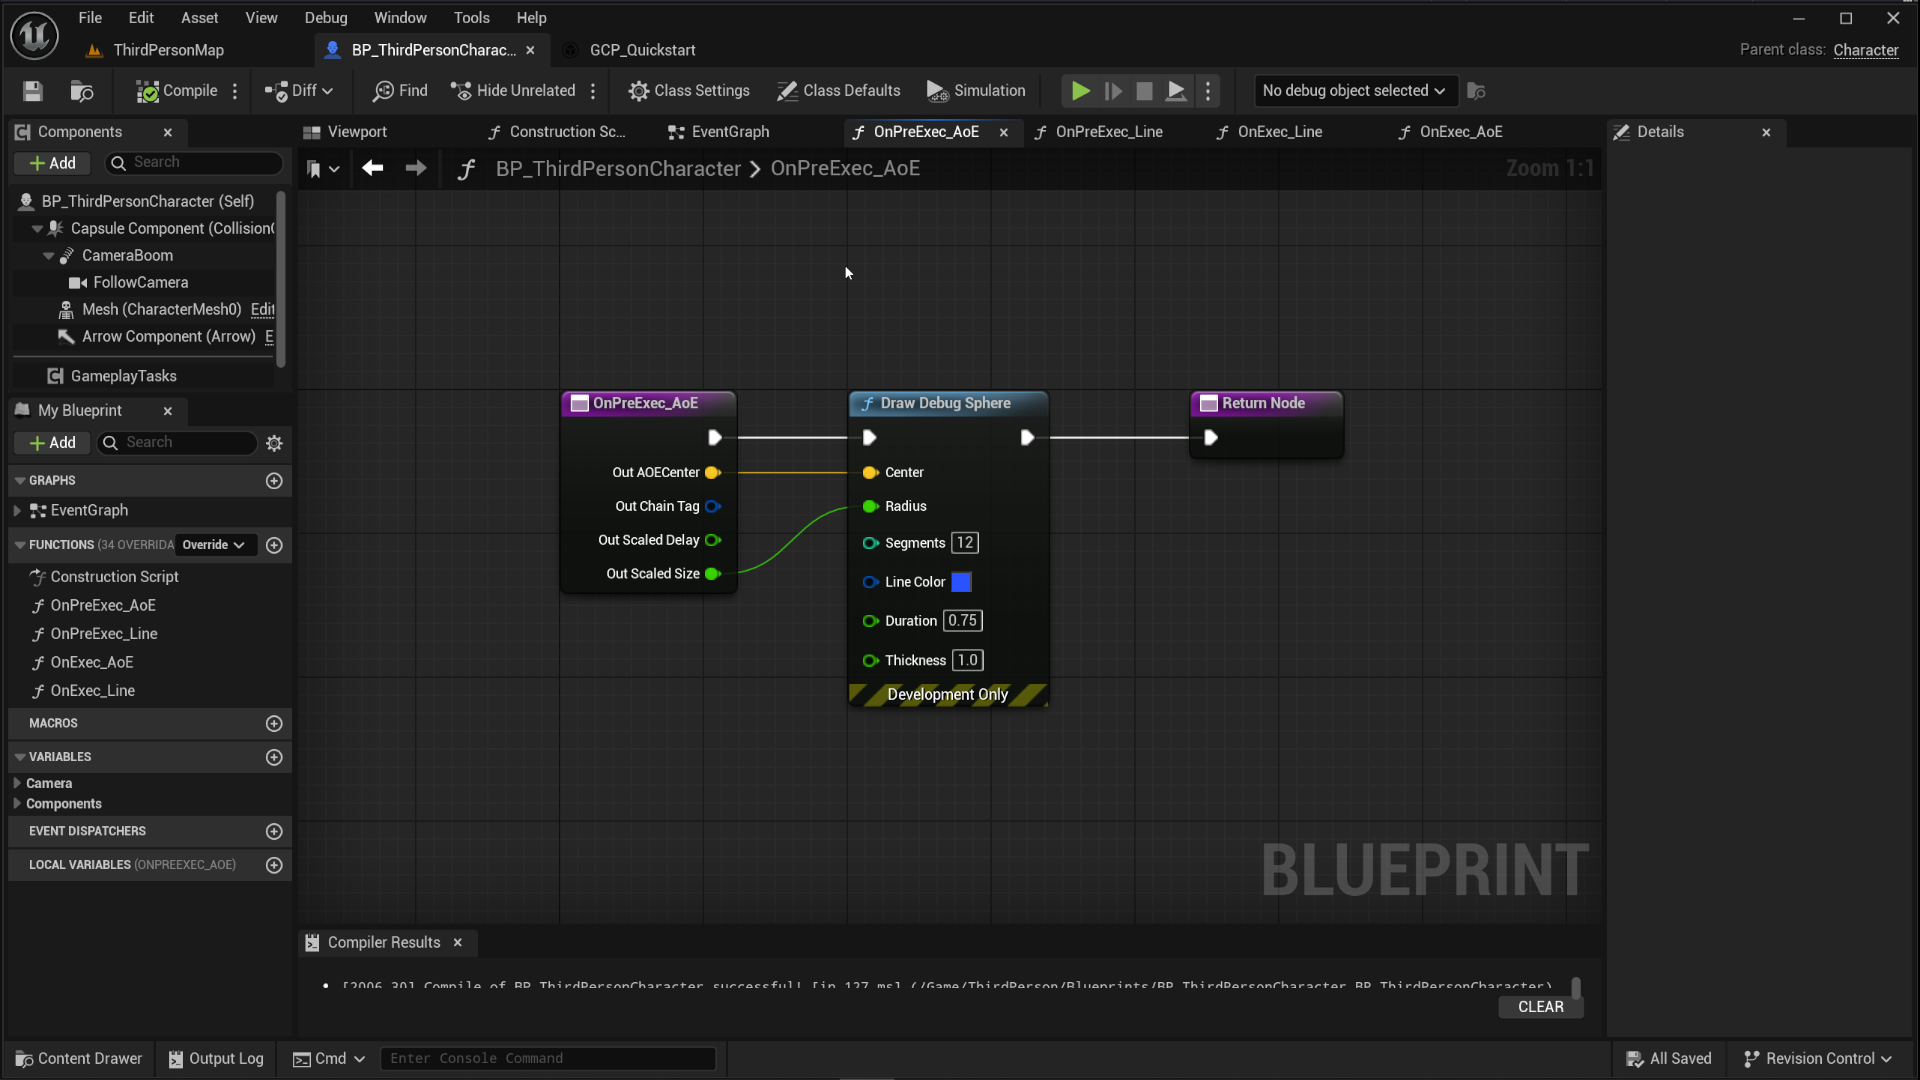
PreExec_Line: 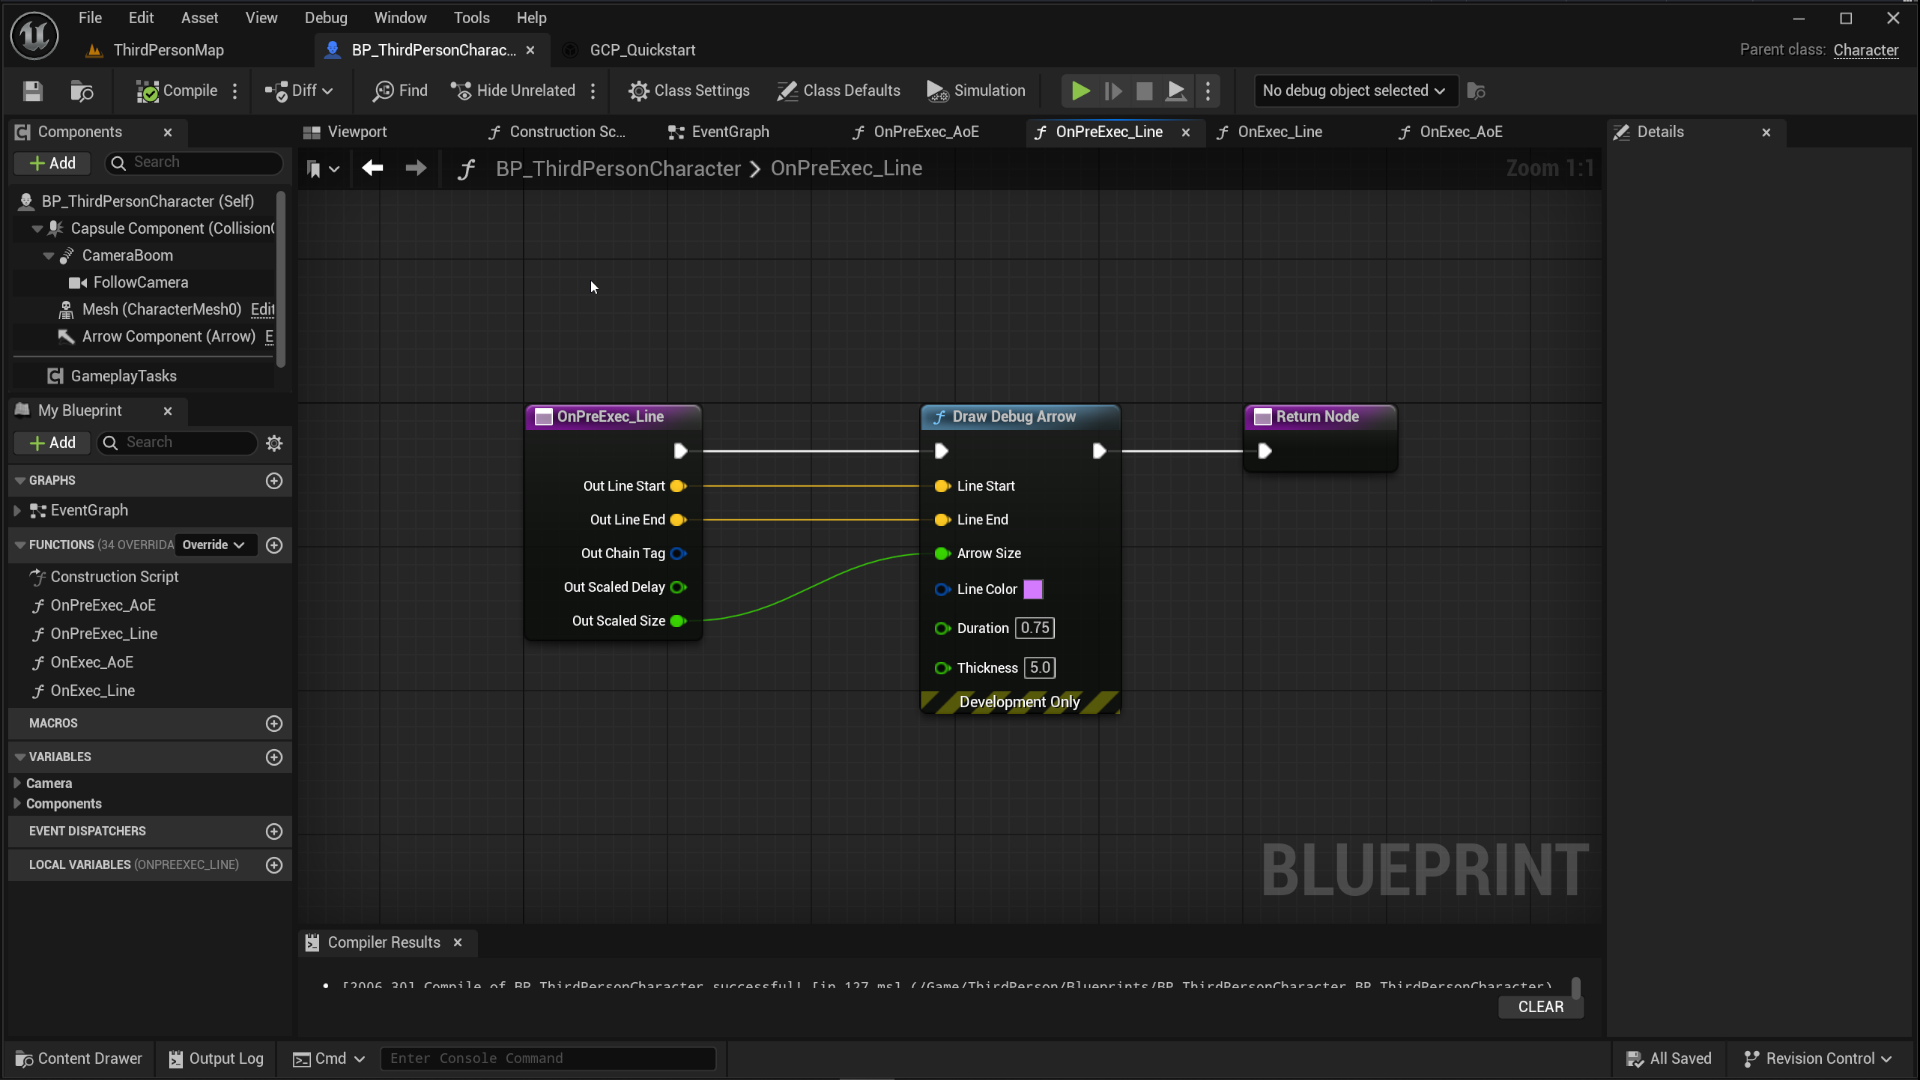
Exec_AoE: 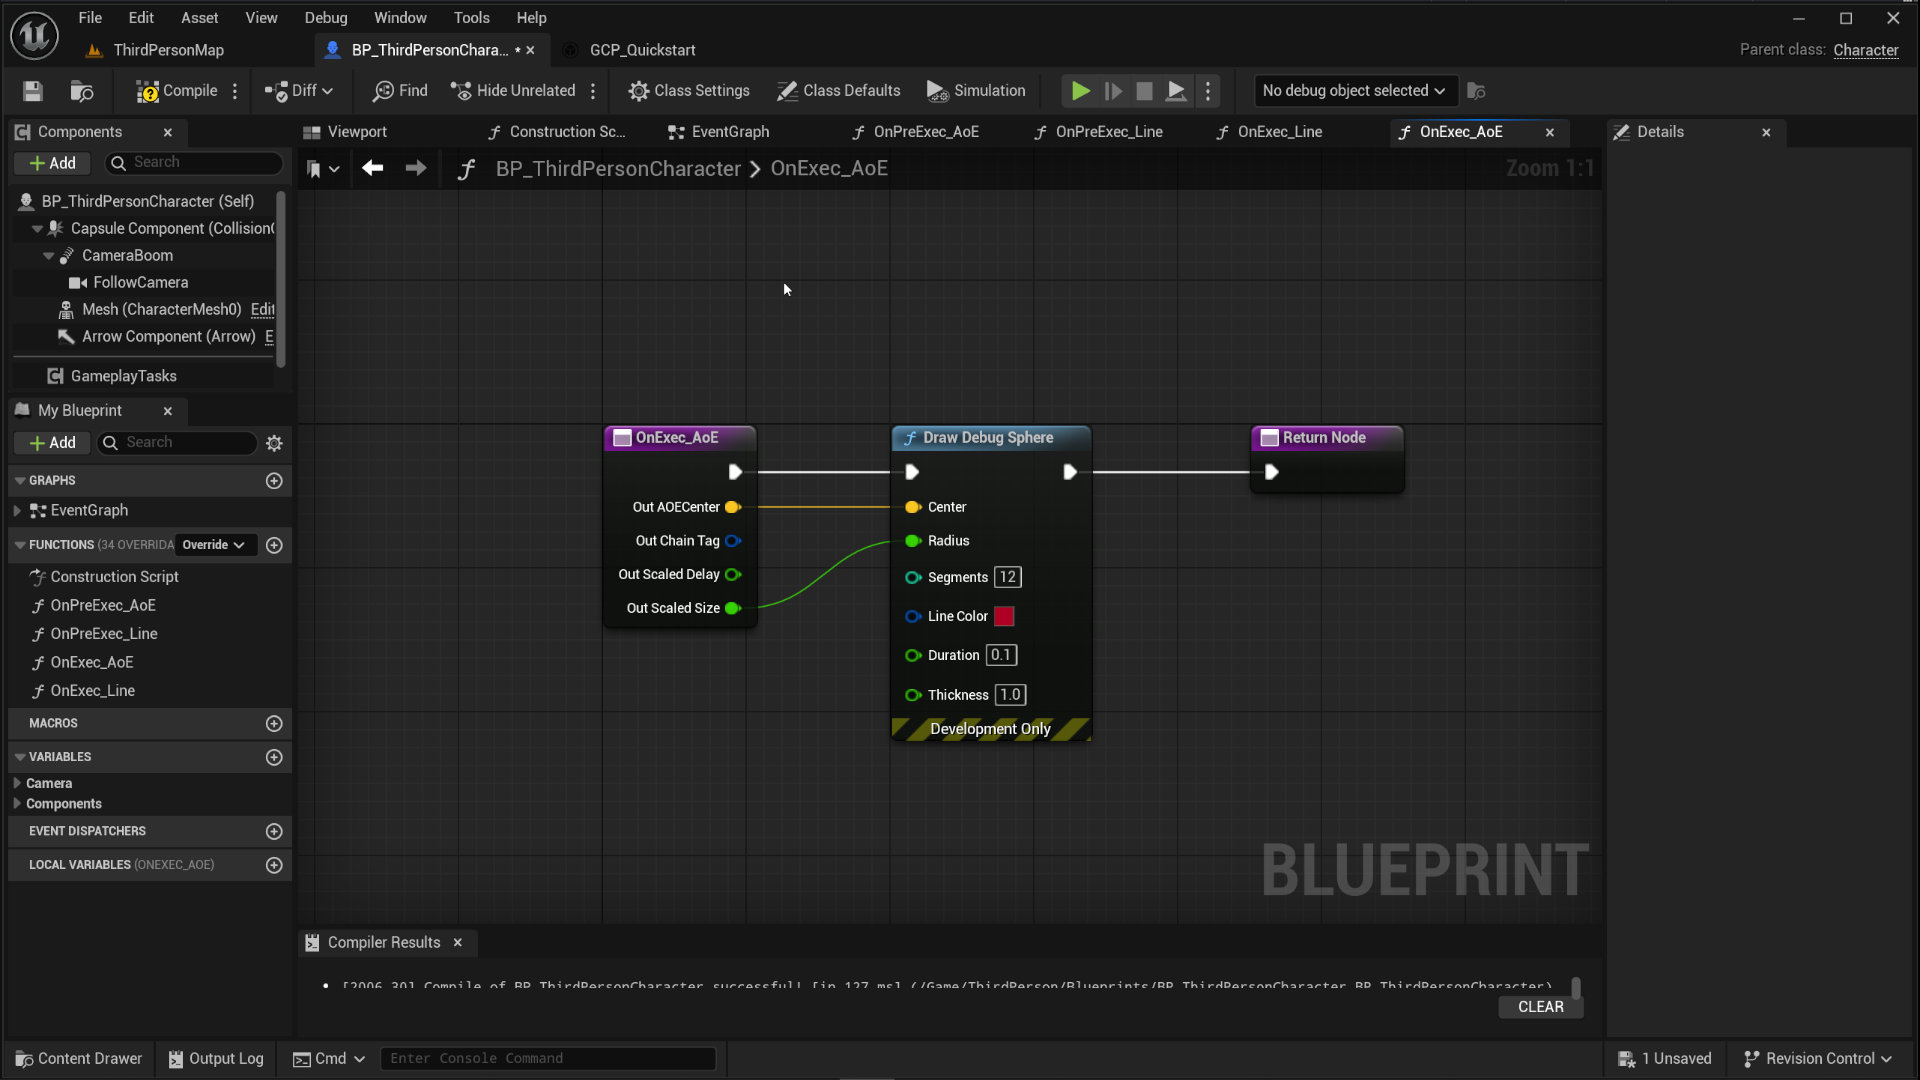
Exec_Line: 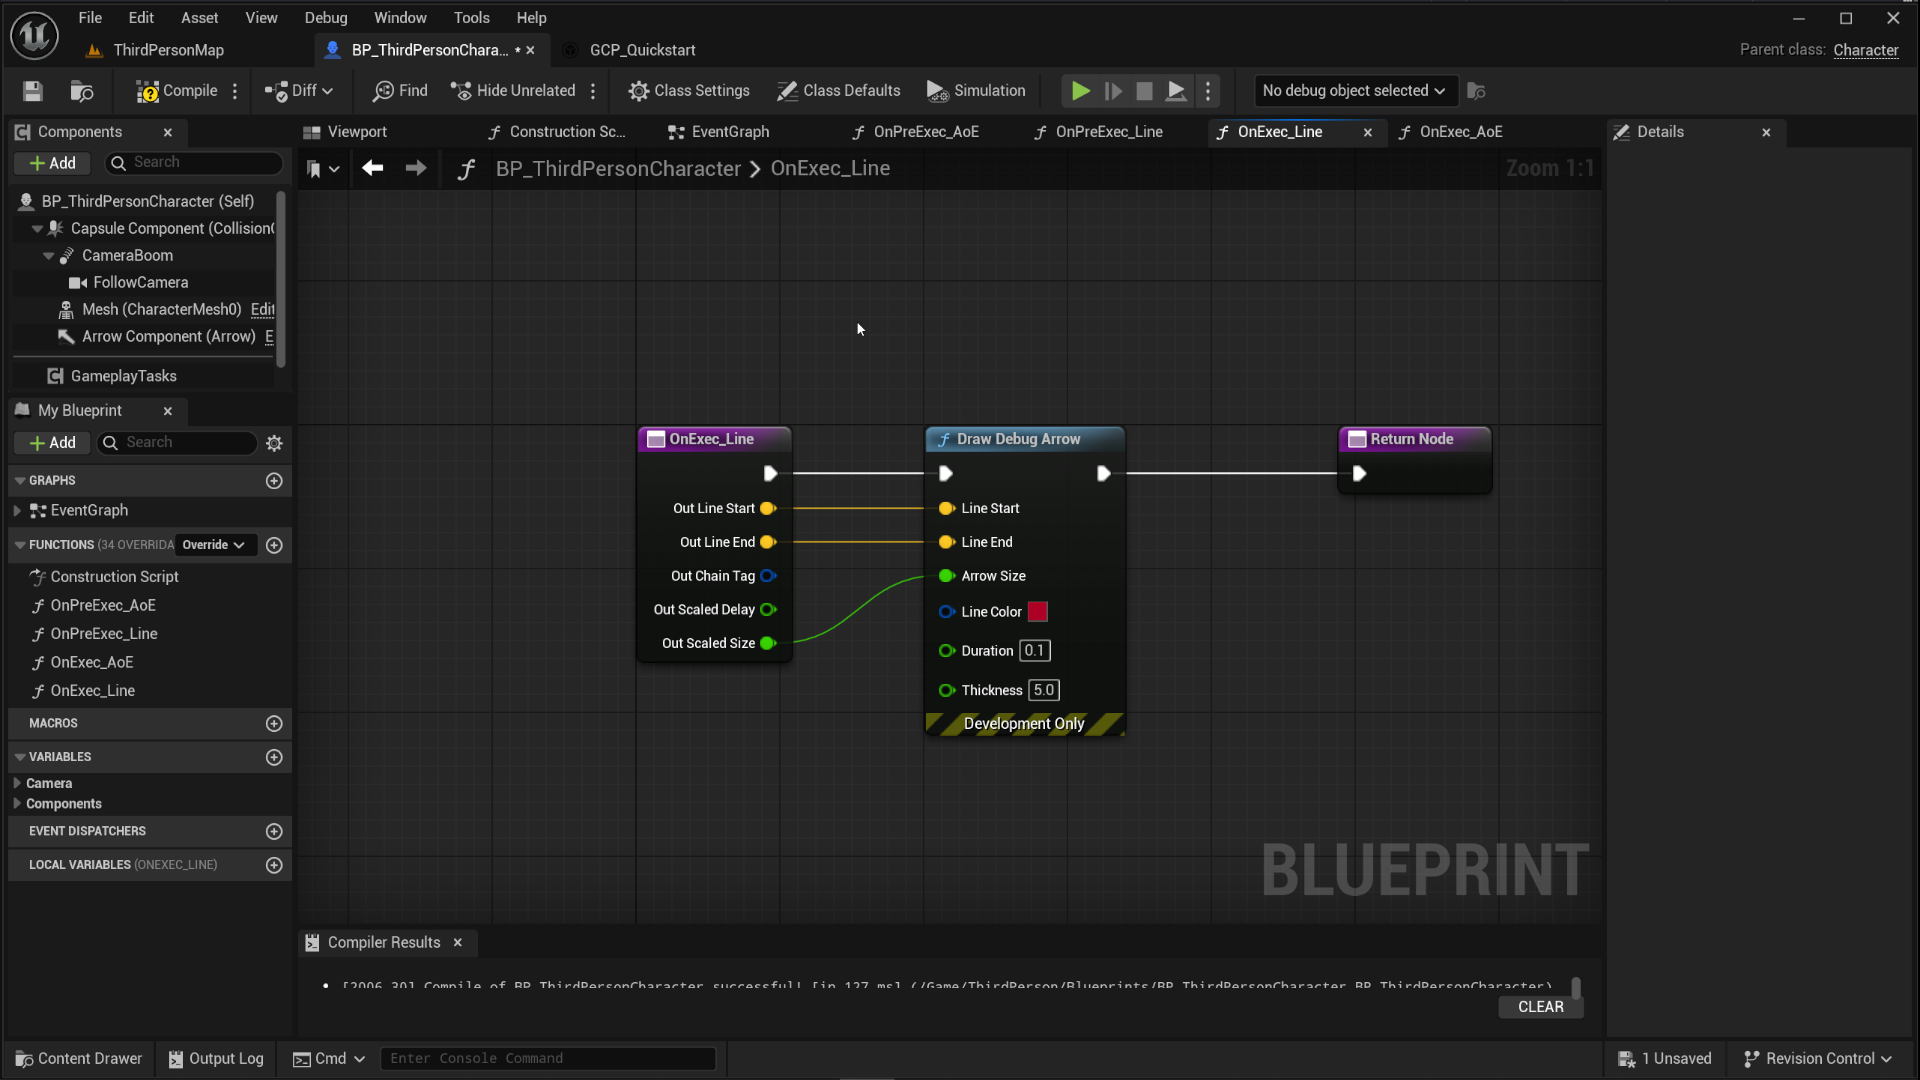
This is what the full graph for the demo looks like: 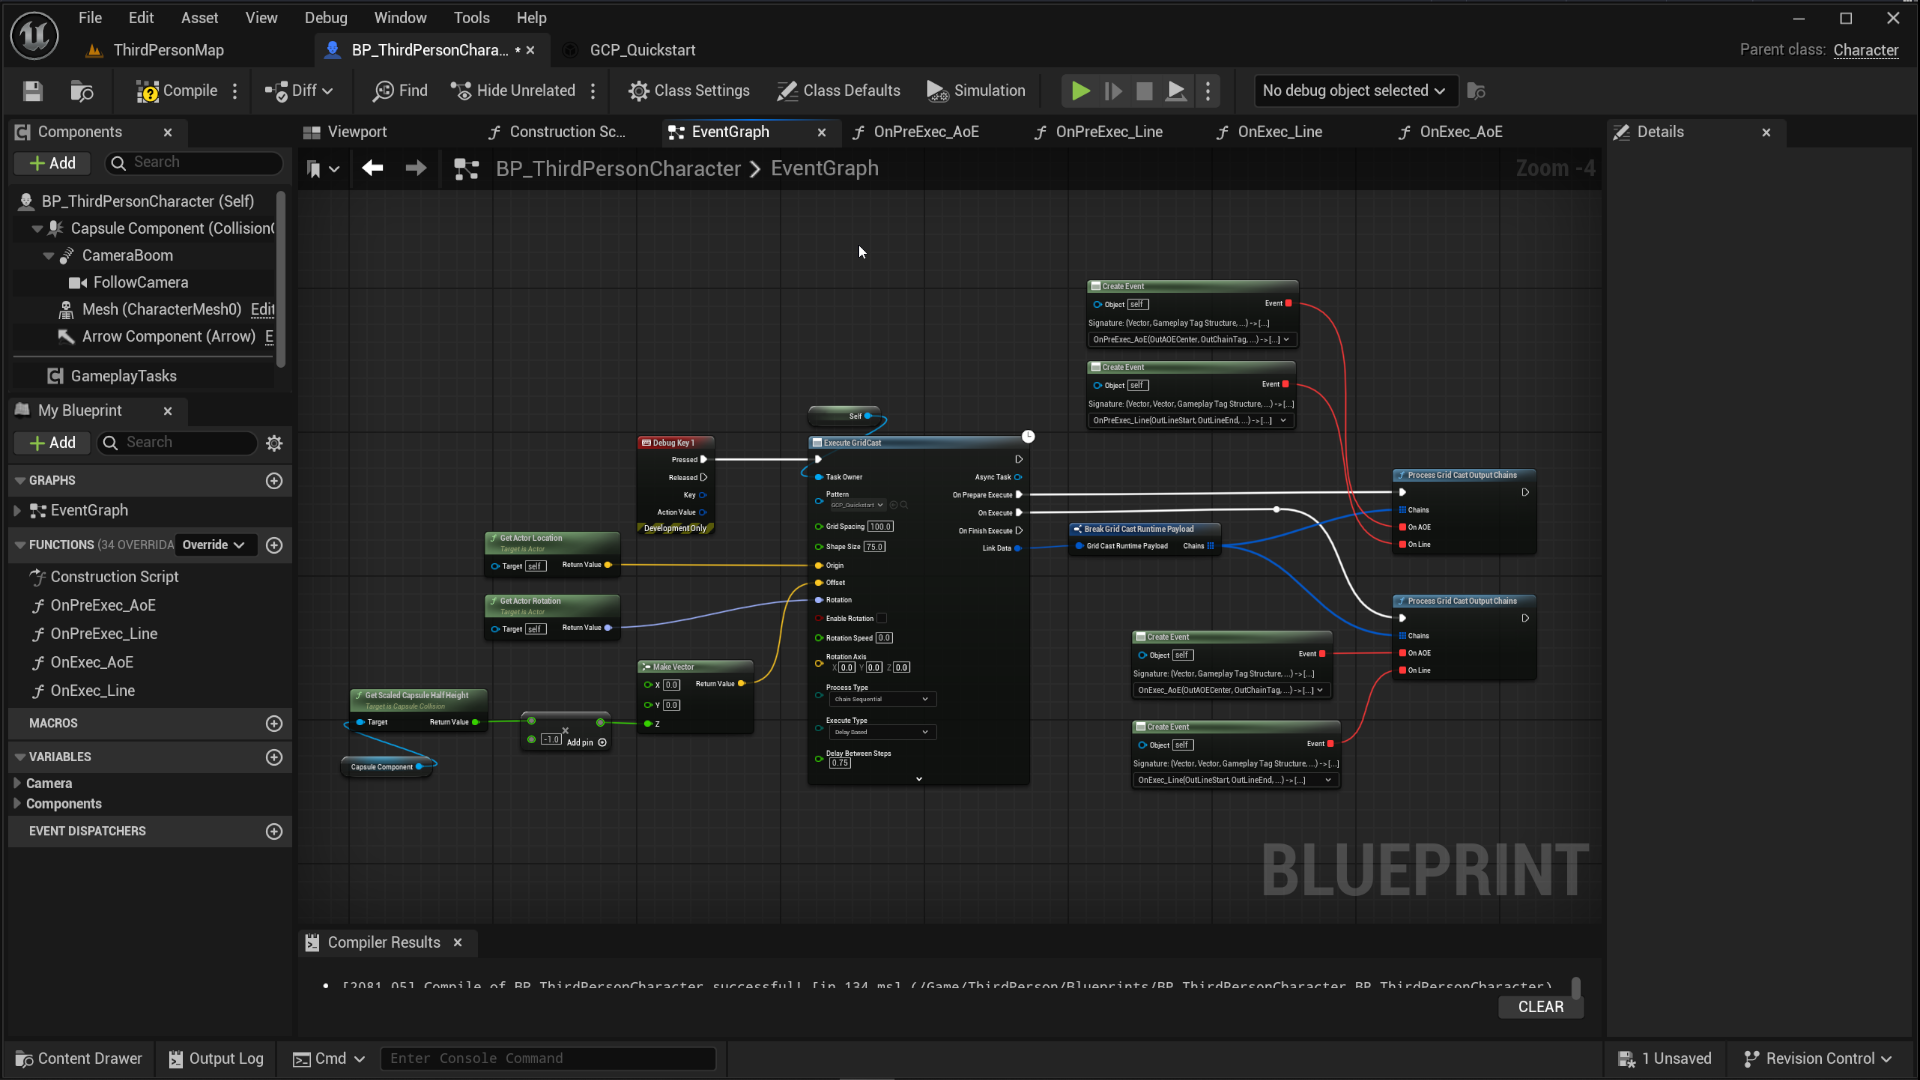
This is what the pattern for the demo looked like: 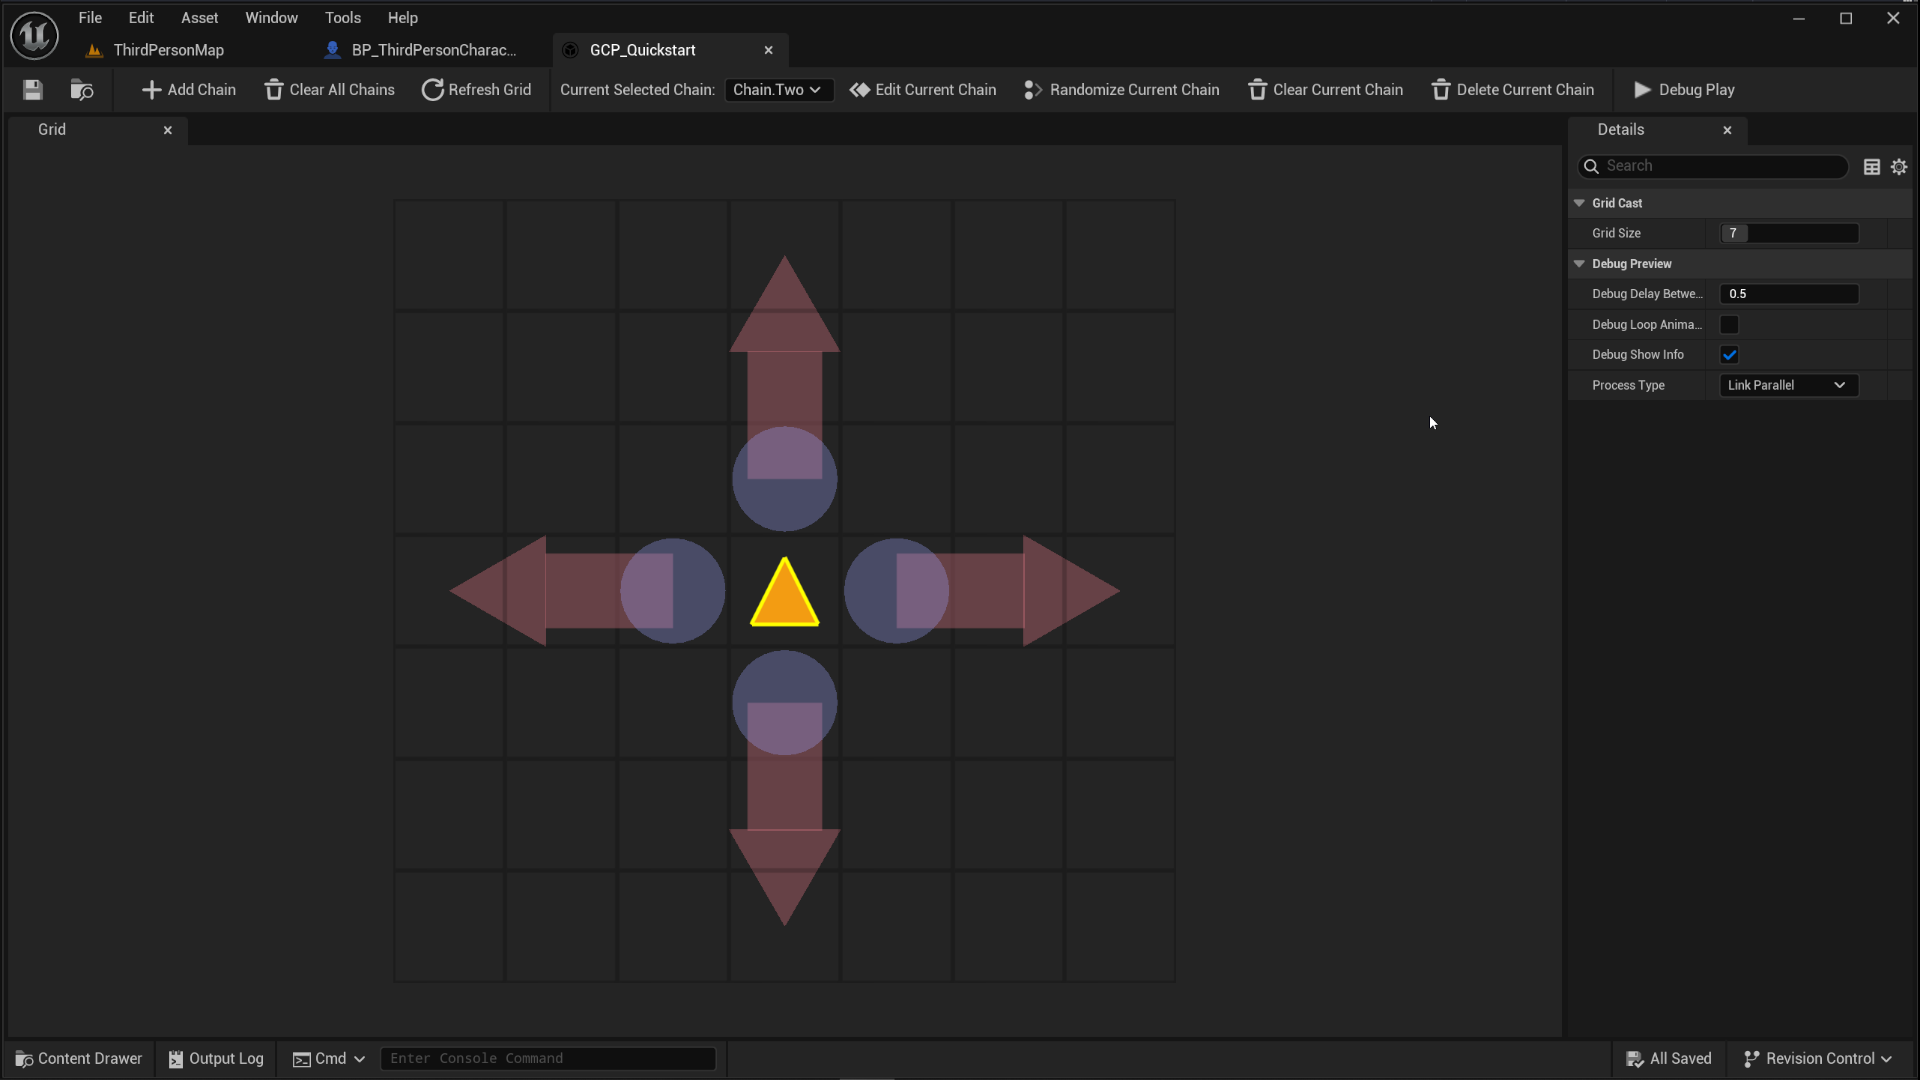
And this is what it'll behave like when pressing 1 on the keyboard:
WARNING
You need to make sure your "Processing Type" on the execution node is set to "Chain Sequential," if it's not, you might see that the first link from each chain process in steps until all links for all chains are done processing.